Double brooding can provide an advantage, but it comes with its downsides as well. If you decide to double brood in hopes of improving swarm control, you must understand that this practice will result in a significantly larger colony.
Adding an additional brood box instead of a super will not only double the space within your hive but also double the volume the bees must keep warm. This is a crucial consideration you must not overlook; if the bees lack the strength to keep that space warm, they will struggle and will not expand as you would expect them to.
Lets look at the pros and cons of double brooding:
Pro’s
May help with swarm control
Will give more room for the queen to lay, thereby generating a bigger colony which should result in more honey
Gives the potential for fewer inspections
Allows the brood nest to develop in a more natural way and will enable more honey stores within the brood area, which will assist with winter stores
Facilitates colony expansion as you can split the boxes once both have brood and simply add a queen
Con’s
Can be more difficult to manage, especially for a beginner
Finding a queen in a double brood box can be much more challenging
The colony will be significantly larger, resulting in handling a lot more bees
More honey will be stored in the brood boxes, making them much heavier to lift during inspections
Makes moving the colonies more difficult
Requires more equipment
Increases the height of the colony for lifting boxes and off
Double brooding is not for everyone; it results in heavier boxes to lift, taller bee hives and a lot more bees to handle. While it is not the ultimate solution for swarm control, it may provide you with more time before you need to implement swarm prevention strategies.
If you aim to expand your colony numbers, double brooding is certainly an effective strategy to achieve this.
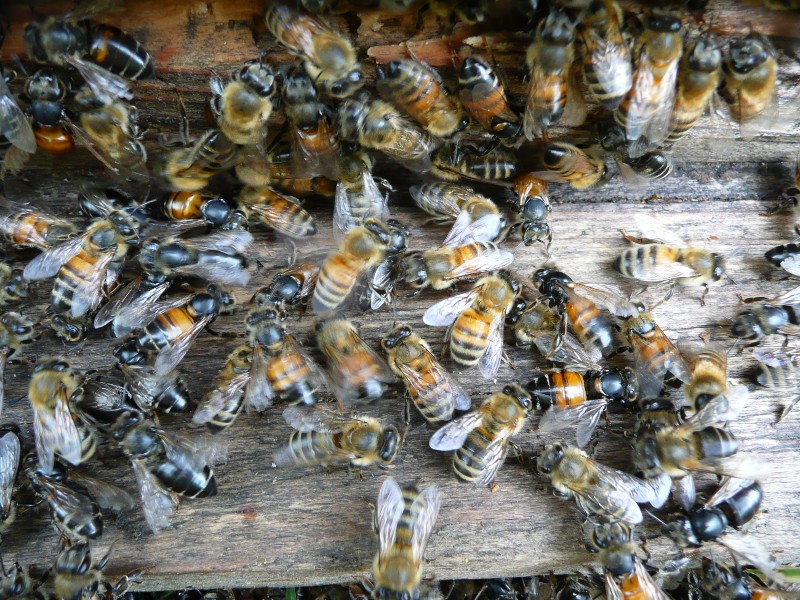
Recently I have taken a number of calls from beekeepers who are telling me their bees have absconded. So what does mean and why is it happening?
Let’s look at what Absconding means first – This is when the entire colony leaves the hive, they will be preparing in advance of going, just like they would if they were swarming. The queen will be slimmed down so she can fly, the workers will have scouted for a new place to move to and they will fill their stomachs with honey when they go. But, unlike a swarm, the whole colony will go leaving not a single bee in the hive. You may find you still have some sealed brood and stores left behind but that will be all.
So, the next question is why have they gone? Well the truth is that there is still very little understood about why bees abscond. There are however some observations that can draw us to certain conclusions for individual cases. It is known that certain conditions have been present when bees have absconded:
Nectar dearth – a severe shortage in nectar flow which will inevitably see a reduction of stored food in a colony, especially a colony that is growing fast.
Predators – if the colony is constantly under attach by predators, this could be wasps, hornets, ants, wax moths etc
Constant disturbance – if the colony is constantly being disturbed by animals, humans or even noise, this can be a driver in seeing them move on.
Sever hot weather – overheating in the hive, especially a hive that is overcrowded.
Varroa – High levels of varroa cause a lot of stress on a colony.
Honeybees have a natural instinct for survival so you can see why the reasons above make sense – moving to a new home due to lack of forage in their current location, or being invaded by other insects does sound like a good plan! Equally if the bees were being constantly disturbed you can see why they may like it and decide to move home.
Hot weather will generally see our bees bearding. This is where they hang outside of the entrance of the hive. It has been reported, that in prolonged extreme temperatures, the bees have been known to leave the hive and not return. However I have heard of this happening in the UK.
The point about varroa is defiantly worth taking onboard. It is known that in un-managed colonies high levels of varroa have been found in whats left of the brood nest. So, it would not be wrong to suspect that the same can happen in managed colonies where the varroa levels are high too.
I hope that this in someway provides maybe an insight into what happened to your bees. There maybe somethings you can do to mitigate it happening again.
We make up splits or nucleus for various reasons. It may be that you want to increase your colony numbers and making your own splits, if you have strong healthy colonies is a good cost-effective way of doing this. Depending on the time of the year you do the splits it may affect your honey harvest from the colony. Splits are also made as part of swarm control /prevention.
There are a couple of things you need to take in to account when making up splits. Firstly, if you are to keep the new colony in the same apiary as the parent colony the flying bees will return home. You must therefore ensure you shake extra bees into the nuc to mitigate this.
If you have several colonies, but none that are exceptionally strong, you can make a split up by taking frames from multiple colonies. It would be best practice to take bees from 3 colonies not 2 as it is said that bees from 2 colonies will fight but from 3 or more, they will not as there will be confusion with the different pheromones.
And lastly, you need to make sure that the colony/colonies you are splitting from, are strong and disease free.
Equipment you will need is a nucleus hive, these usually take 5 or 6 frames. These are available in both wood and polystyrene; the advantage of the polystyrene is that they are lighter, which makes moving them much easier.
A rule of thumb is that a split is made up with 2 frames of brood and 1 frame of food. You can of course put in an extra frame of brood but ensure that you have enough bees to cover all the brood. So, all frames of brood that go into the nuc should be covered with bees. Make sure these brood frames have plenty of sealed brood rather than wet brood on them, this will ensure you have young bees quickly which will help the nuc to grow.
If you are making up a split from a colony that is throwing up queen cells and plan to use one of the cells as your new queen, make sure you remove all other queen cells on the frames and only leave one. If you are leaving the nuc on the same site as the parent colony you will also need to shake in 3 frames of bees to compensate for the flying bees that will return home! Do make sure you don’t accidentally shake the queen in from the parent colony!!
Fill the rest of the Nuc box up with new frames and foundation. If you are adding a new queen, you can do this at the same time but do observe the reaction that the bees have to the queen. You may need to leave them for an hour or two before adding her. Some beekeepers will leave the bees for a few days before adding her. The bees will of course start to make queen cells in this situation so, if you do this, ensure you go back through the frames and remove any queen cells they start before putting the queen cage in. Leave the tab on the cage and then check the frames again 2 days later for more queen cells. Remove them all and remove the tab on the queen cage at the same time. Ensure the small nuc has plenty of food, offering them syrup will help them with the new foundation they have to pull, make sure you give them enough food to last them until at least your next inspection. We recommend leaving then for 10 days now before you check to see if the queen has taken.
If you are making up a nuc using a queen cell, select a queen cell that is not sealed. This will allow you to estimate when your new queen will emerge; it will be 8 days after the cell has been sealed. The queen will hopefully mate successfully and start to lay anywhere between 2 to 3 weeks, the weather may affect this. I leave my colonies for 3 weeks before I check them for eggs. Do however, keep an eye on this colonies food stores and offer them syrup if they need feed.
Replace the frames that you have taken from the parent colony/colonies with new frames and foundation.
If it’s in the earlier part of the season that you make your nuc up, you will need to keep an eye on space and make sure you have a full hive ready for when it’s needed. If you are making your splits late in the season, they overwinter well in the nuc box.
Summary:
Ensure parent colony is strong and free from disease
If you are letting bees make their own queen, make sure you select an unsealed queen cell
Ensure the new colony has sufficient food to last until at least the next inspection
Make sure you have enough bees to cover the brood in the nuc
If you are leaving the bees on the same is site as the parent, shake in an extra 3 frames of bees to compensate for the bees that will fly home
Don’t make a nuc up from 2 colonies as the bees will fight, make it up with bees from 1 or 3 colonies
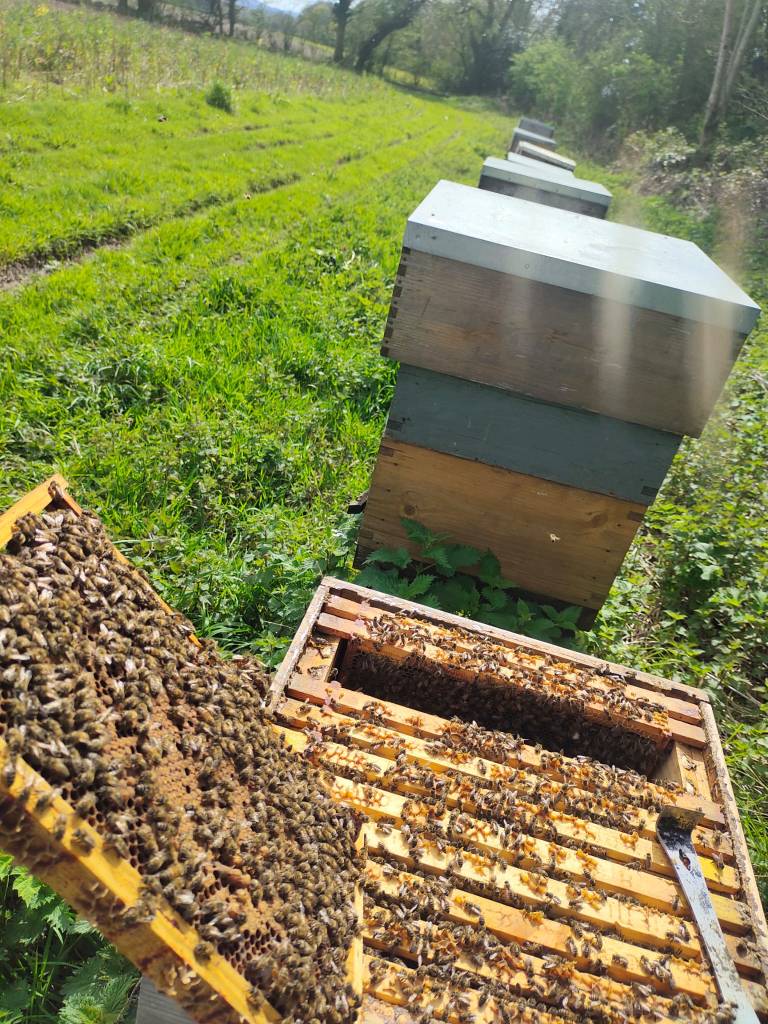
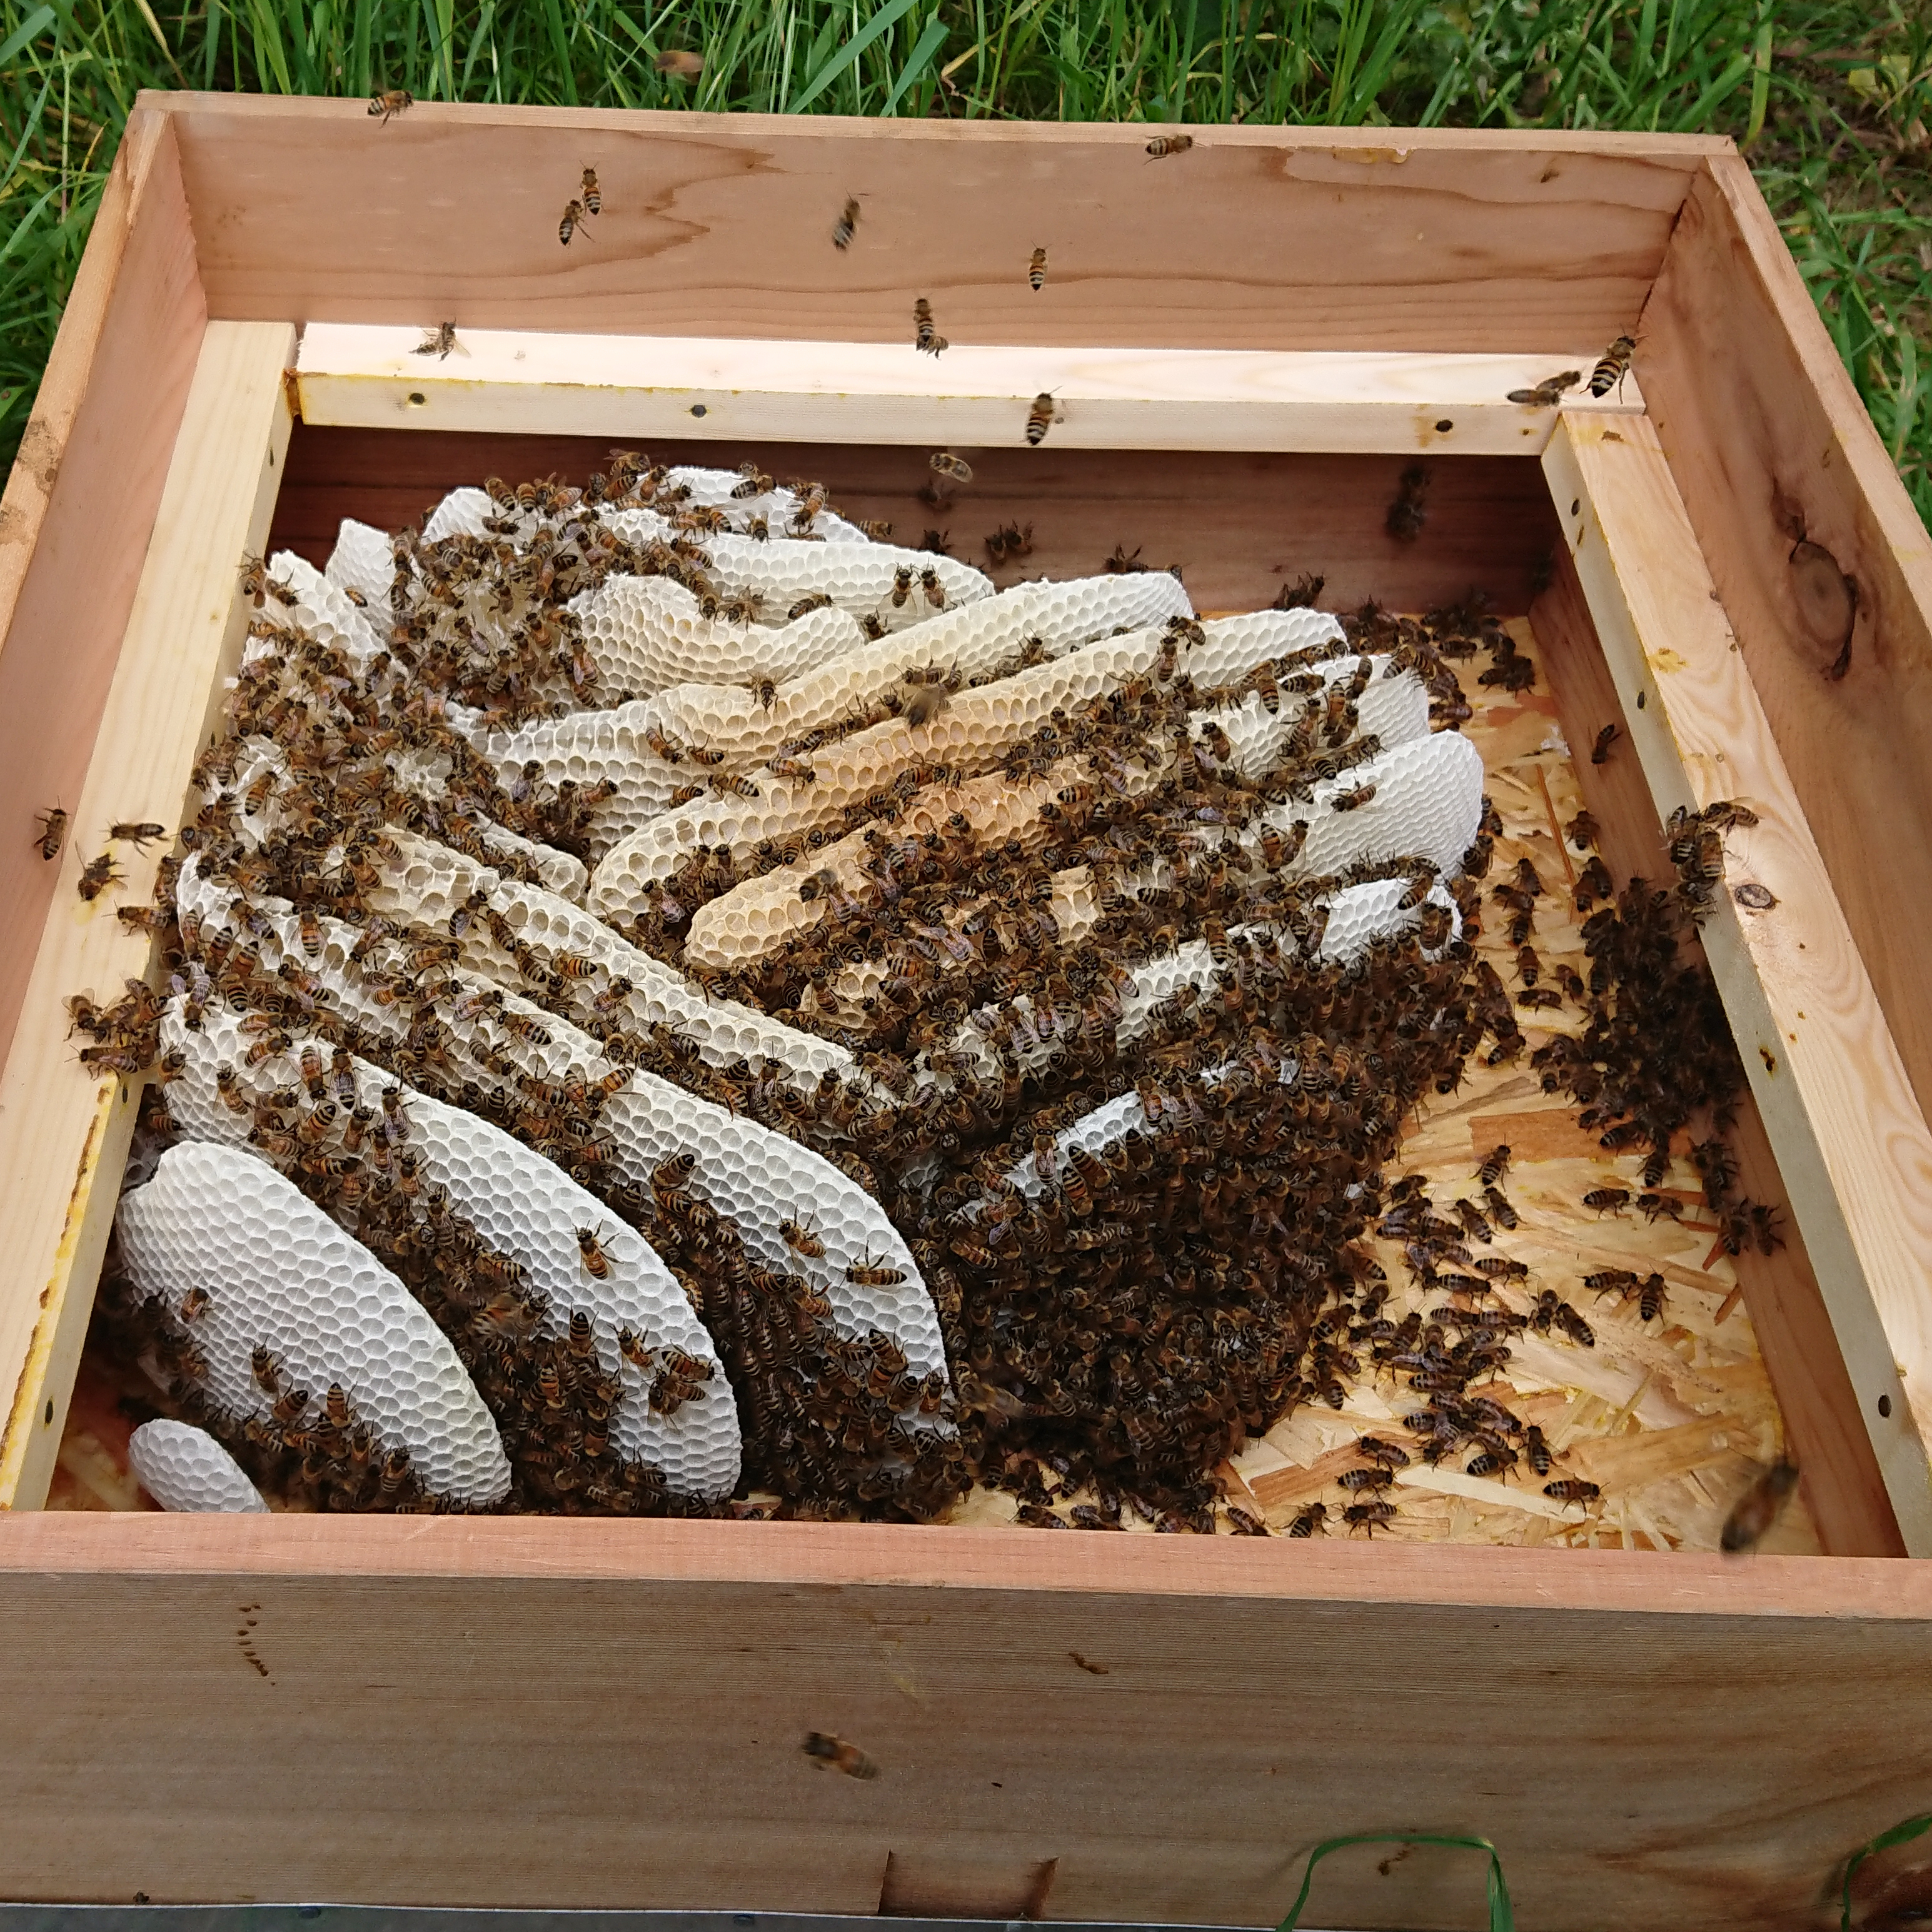
This Nuc is 2 weeks old. It was made from a single colony taking 2 frames brood, 1 frame food and adding 3 new frames with new foundation. Fed with Ambrosia Syrup.
If you are reading this the chances are you have lost your bees over winter, you are feeling upset and saddened and you want to know why they have died and most beekeepers think “What did I do wrong?”
There are always winter losses and there are many reasons why colonies don’t make it through winter. It stands to reason that the more colonies of honeybees you have the more likely you are to suffer with winter losses and it may not be anything you have done so before you go blaming yourself see if you can see why the colony has died. It may be that you can’t work out what has happened, below I have given some examples of winter losses.
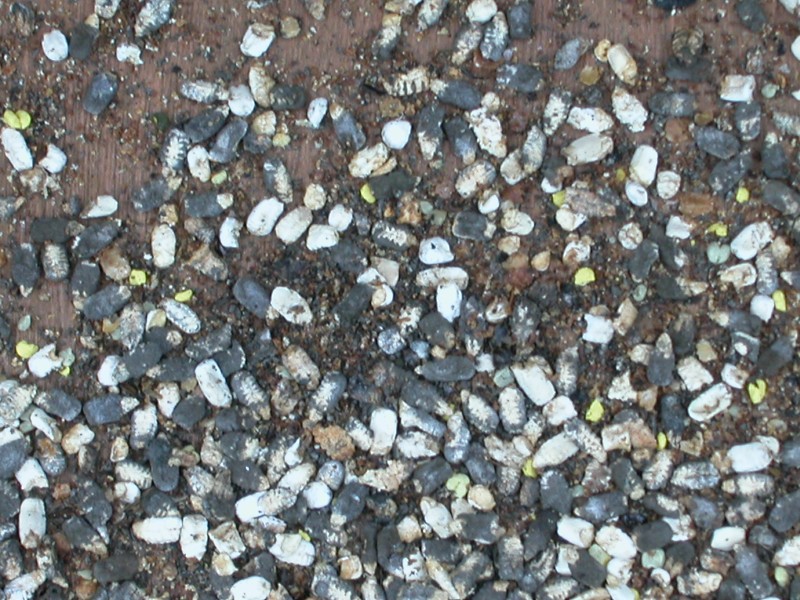
Starvation – there are two types of starvation, one is beekeeper error, you took too much honey off your bees and didn’t bother to check them through the winter and they have starved. The bees will be found with the heads in the cells because they are desperate for food. This is your fault entirely and yes you should blame yourself, this was completely avoidable and its because you were greedy – sorry but that is exactly what this is. The early spring is often when we see this, the bees become active, the beekeeper sees the bees flying and assumes they are collecting nectar. Well have a look around you, how much flower is there and is it warm enough for the nectar to flow. Yes they are bringing in pollen, but they need nectar and now they are active and the queen is laying they need more and more of it. They will be eating more than they can forage and so they starve.
The other starvation is “Isolation Starvation“. This happens when the winter cluster of bees moves away from food instead of with it. The result is the same, dead bees with heads in cells but you will also have frames of food in the brood box and even more sadder is that the food may only be a couple of inches away from the dead cluster. This is not your fault, do not blame yourself, there is nothing at all that you could have done to help these bees. Sadly nature has a weird way of working at times.
Queen issue – If your colony was queen-less going into winter they are not going to survive, even if there are still some alive in early spring they are not going to live long enough to support the colony until you can get a new mated queen to go in with them. If you are lucky enough to find mated queen early the bees will be too old to support her. It could be that you had a late supercedure happen and she didn’t manage to mate. A colony with a drone layer is not going to make it, again this may make it through winter but, sad as it is, the colony is doomed.
Varroa / Unhealthy colony – An unhealthy or stressed colony is unlikely to make it through winter. Varroa causes much stress on a honeybee colony, to avoid high varroa levels going into winter make sure you treat your bees at the end of the season. I have a post on Varroa which will give you much more information on this topic. Make sure you look at the brood throughout the season to see that it looks healthy. Also look at your bees, do they look healthy? Varroa damage can be seen at larvae stage and also at capped stage, your bees will detect infected cells, they will uncap them and remove the infected larvae, so look for chewed cell capping’s. You could take some blame for this if you didn’t treat your bees.
Unusual winter with temperature changes – With climate change we are seeing winters with more and more temperature fluctuations. The bees cluster in winter during the cold weather, if we have warm days they will break this cluster and maybe even go out to forage in the warmth of the sun. The winter days are short and the temperatures drop quickly, this can have a big affect on the bees, some won’t make it home because they get too cold and in the hive they may not make it back to the main cluster and they may die from the cold. A small weak colony will almost certainly die in a big hive as they won’t be able to generate enough heat. You definitely can’t blame yourself for this, no one can control the weather!
Predators – Mice are big winter predators to honeybees, the bees offer a lovely snug warm environment with lots food for them! If they get into the broodbox they will cause lots of stress to your bees. By fitting a mice guard or simply reducing the hive entrance to a single bee space you can stop mice getting into the brood chamber.
Moisture – moisture by way of condensation can cause detrimental effects at any time but especially during the cold winter months. Make sure your hives have appropriate ventilation, many beekeepers make the mistake of covering both holes in the crownboard, this stops the airflow and causes condensation. This may cause the demise of your colony. If you think your bees have died due to excess moisture have a look at the hive ventilation and also look at the location of the hive, does it very wet/damp where the hive is located?
Blocked entrance – Your bees need to be able to get out of the hive, even in winter they will take short cleansing flights if the sun is out. If the entrance is blocked by something they won’t be able to get out. It could be heavy snow fall causing the blockage or it could be early spring, there will have been natural bee deaths over the winter months and if the colony was big going in these numbers will also be big and could block a small entrance.
There are a number of things you need to keep in mind when doing a hive inspection. This can appear a little overwhelming at first, but once you are inspecting your hives regularly this becomes second nature. Each of these elements on the list are equally important as if there is anything out of sorts with even one, then your hive will become less productive and healthy.
Queenright
It is essential to ensure that your hive is what we refer to as ‘Queenright’ meaning that your colony has a normally laying queen. At certain times of the year your queen may go off lay and you won’t see any eggs. This would usually happen during periods of dearth when no nectar is flowing, or as the weather gets colder. Most times when we inspect a colony it is not essential to physically see your queen, if we have eggs this will usually be enough to confirm our colony is queen right. Once a honeybee egg is laid it stays in this stage for 3 days, therefore if you see eggs then you can be assured that your queen was present a minimum of 3 days ago.
Always check for the presence of queen cells too, these could be swarm cells which may be related to the ‘space’ element within your colony, or they could be supersedure cells. (See our separate post about what to do if you have queen cells).
So how can you tell if your colony is not queen right? Well, of course if there is no presence of eggs… But its not always quite that simple! Workers are also capable of laying eggs, but they are unfertilized, meaning they will only produce drones, you may also have a queen that has turned into a drone layer, this is a mated queen that has run out of her sperm stores.
The topic of identifying queenlessness in your colony is far too extensive to discuss here but we will soon be going into that in another post!
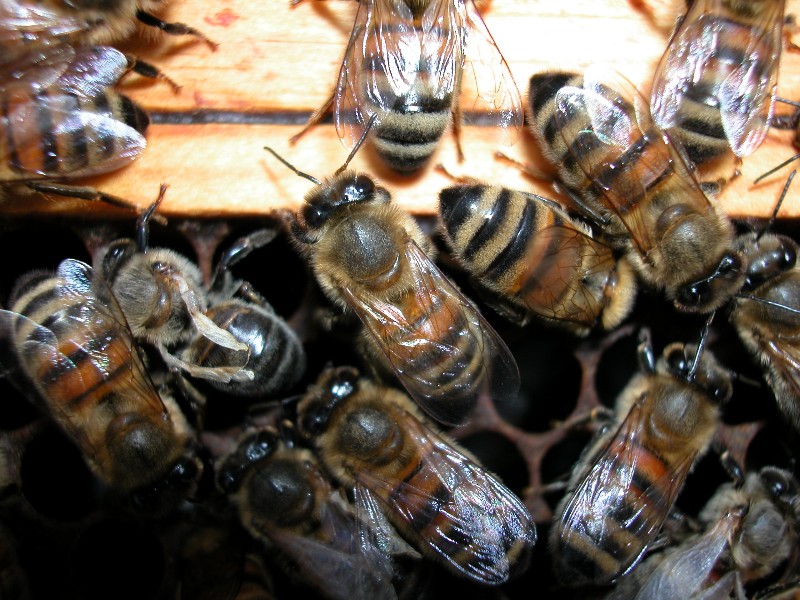
Can you see the Queen?
Stores
No matter how frequent your checks are, you should be looking at what stores your colony has. Do they have enough stores to sustain them until you visit them again? Take a look at the young larvae, do they have a good amount of royal jelly in the cells, or are they looking dry? If your colony is struggling for food the larvae may look dry.
When checking your colony for stores you do of course need to think about which point in the season you are in. Is there a strong nectar flow on? Is there going to be poor weather? Is there a lot of brood in the colony and therefore more mouths to feed? These are all questions you need to ask yourself to ensure that you can estimate if they have enough stores. Also remember that the stores don’t just refer to the honey, but also to the pollen present in the colony. Without adequate stores of the pollen the nurse bees will not be able to produce food for the growing brood. You may find that in a queenless colony your bees do not gather pollen, for this reason we always stop for a moment and watch the returning foragers as this gives us good idea if our colony is queen right with brood.
So how much stores should you need for a full-sized colony? This question is not quite so simple, and the answer will depend on where we are in the beekeeping season. As a rule of thumb, you may say that your colony should never have less than the equivalent of two full brood frames of stores in your colony. However, if we are in June or July and have big colonies 2 frames of stores with no new stores coming in is clearly not going to be enough for your bees. We would hope that in June/July we have a nectar flow on and our hives have supers on that the bees are packing nectar into so there will definitely not be food shortage problem. However, there is usually a break in the nectar flow during the season, this is called “The June Gap” (which is not always in June, it can be a lot earlier). Usually when the June gap hits, your colonies are nice and strong and therefore depending on how long the gap is your bees can eat their way through those supers full of honey very quickly! If this happens the amount of stores may be an issue, it is not unheard of for bees to die of starvation mid season due to a dearth in nectar flowing.
More stores are obviously needed to get your bees through the winter months, so the rule of the equivalent of 2 full brood frames of stores when we are in late September is also not going to be enough. Check out our post about winter preparations for your bees.
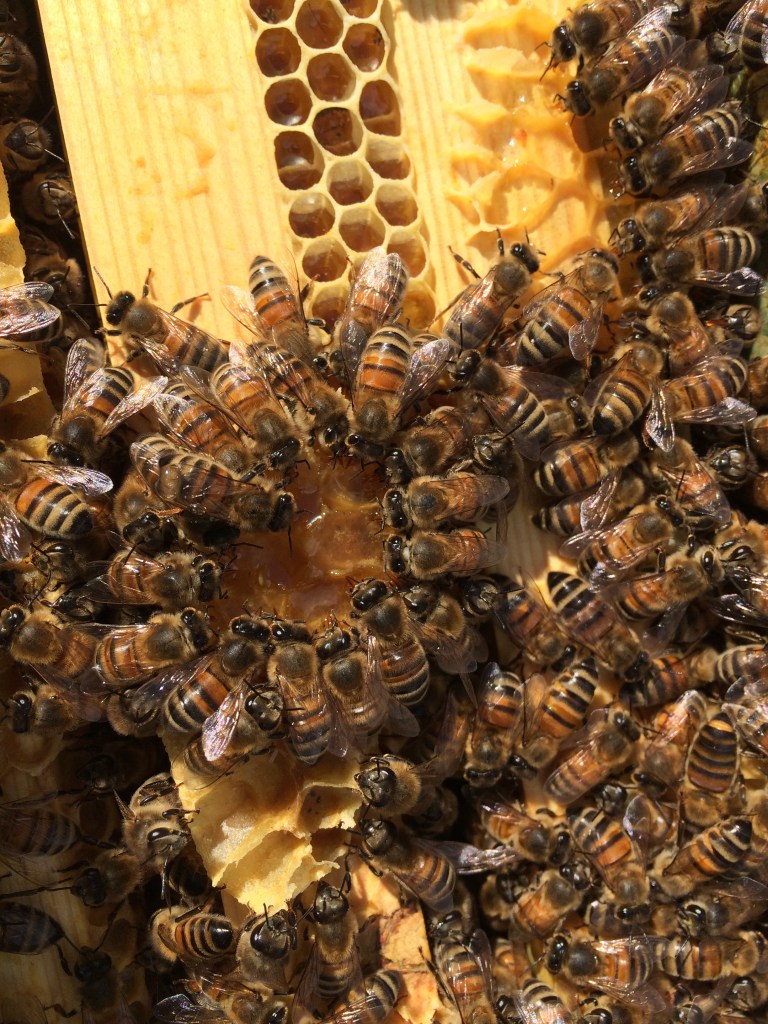
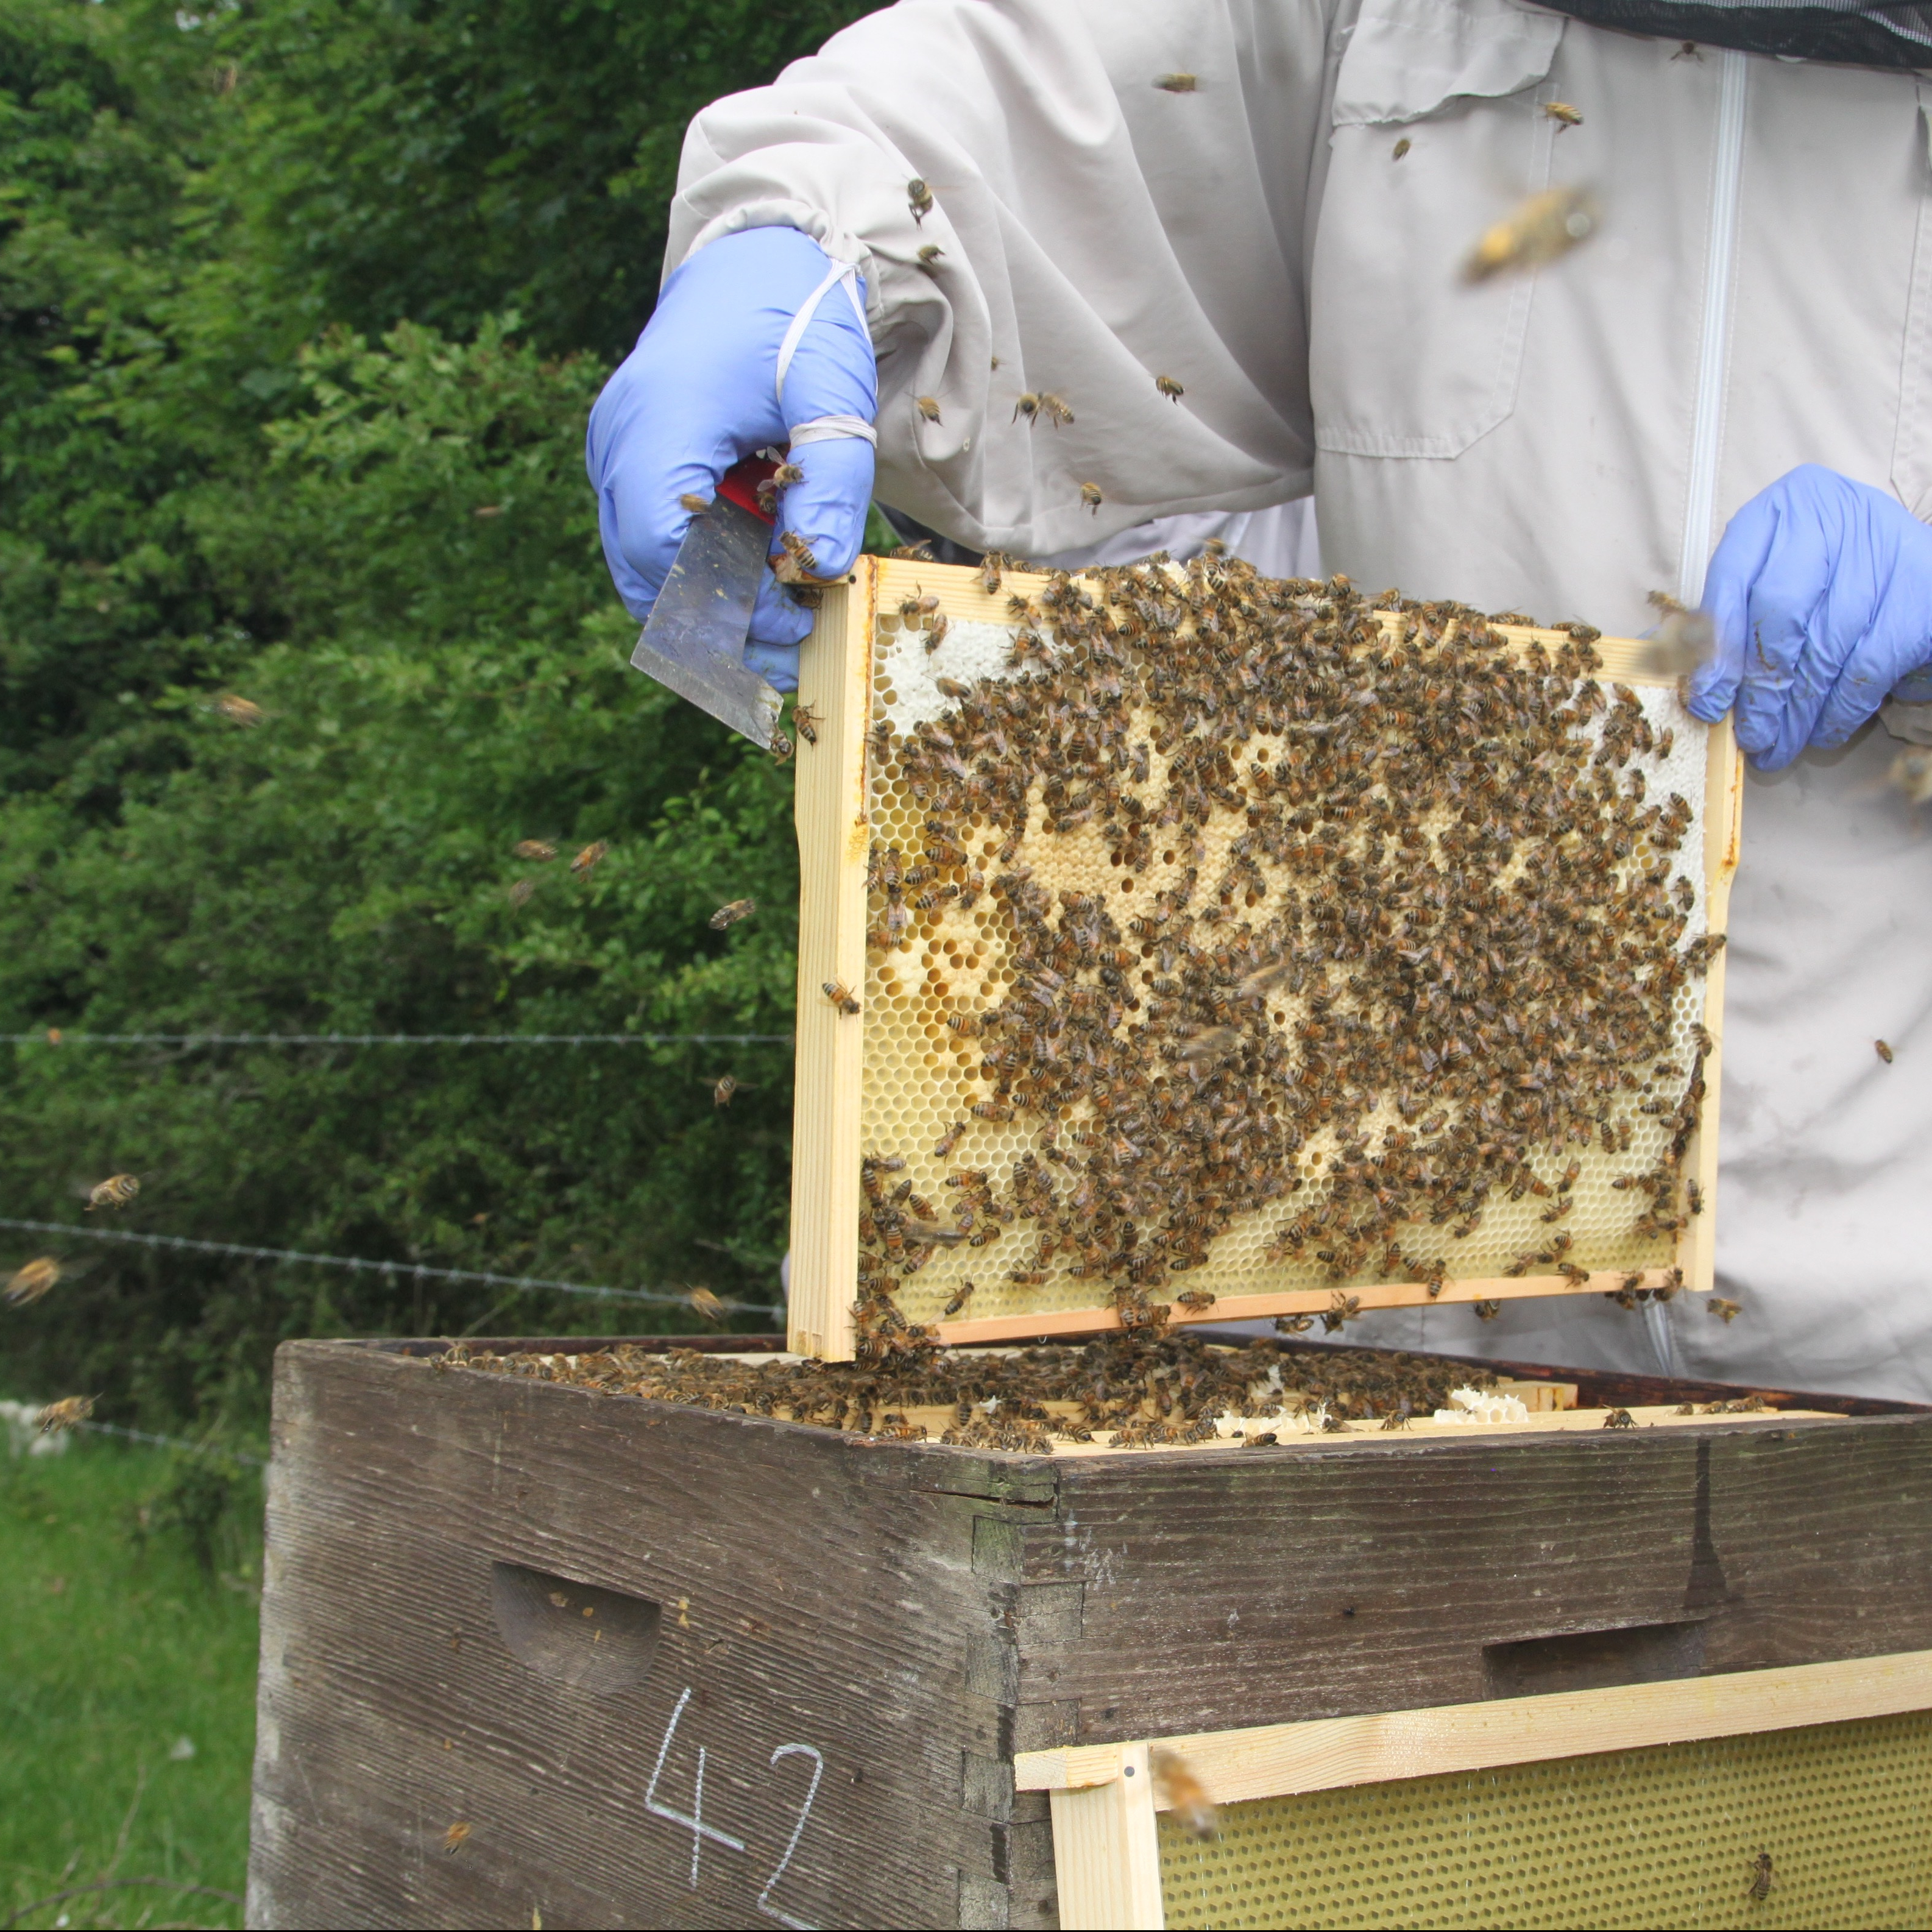
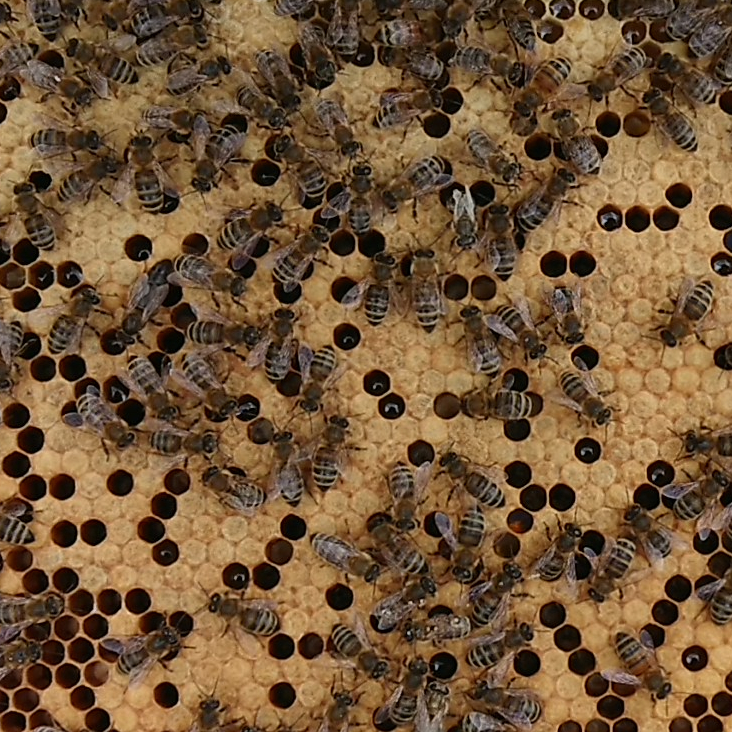
Commercial brood frame, note the stores at the top of the frame
Disease& Pests
The topic of disease and pests is so vast that it needs an entire blog post dedicated to it as well. We will just briefly discuss the importance of detecting disease early on.
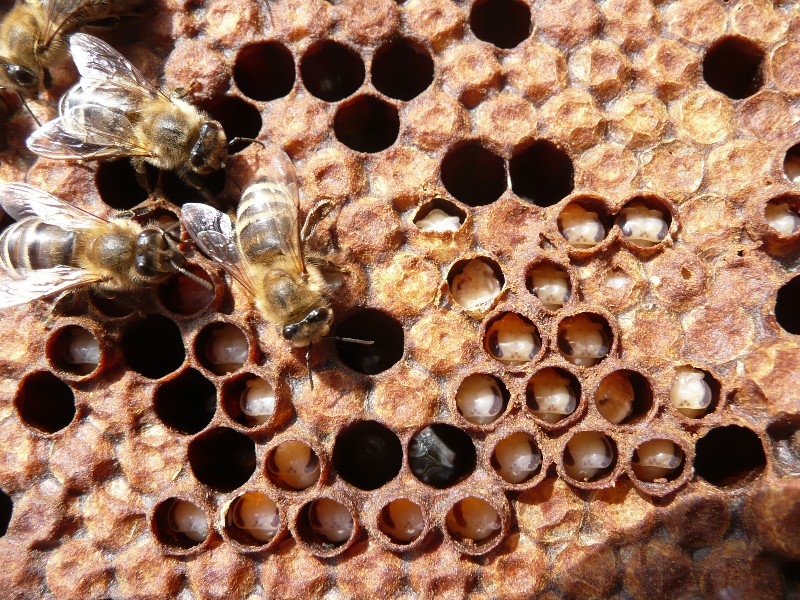
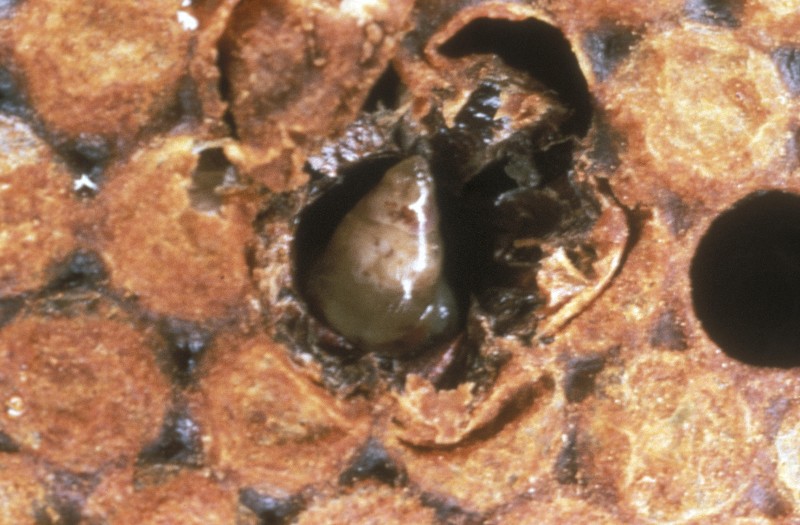
During your hive inspection it is important to inspect larvae carefully, they should be well formed (clearly see their segmentation) and pearly white. Anything out of the ordinary is worth having a closer look at. Check all frames and see if you have similar larvae that is causing concern elsewhere in the colony. If you do see something that does not look right take good clear photos and show a fellow experienced beekeeper. If you want to revisit the same frame later use a queen marker or even your hive tool to mark the top bar of the frame so you can locate the frame again. There are some relatively common brood diseases that show now and then like chalk brood, sac brood, stone brood and bald brood. These are usually not much of a concern and you do not need to notify anyone. If however you do have larvae that looks like EFB (European Foul Brood) or AFB (American Foul Brood) you need to get in touch with your local bee inspector as these are notifiable diseases; contact details can be found on BeeBase.
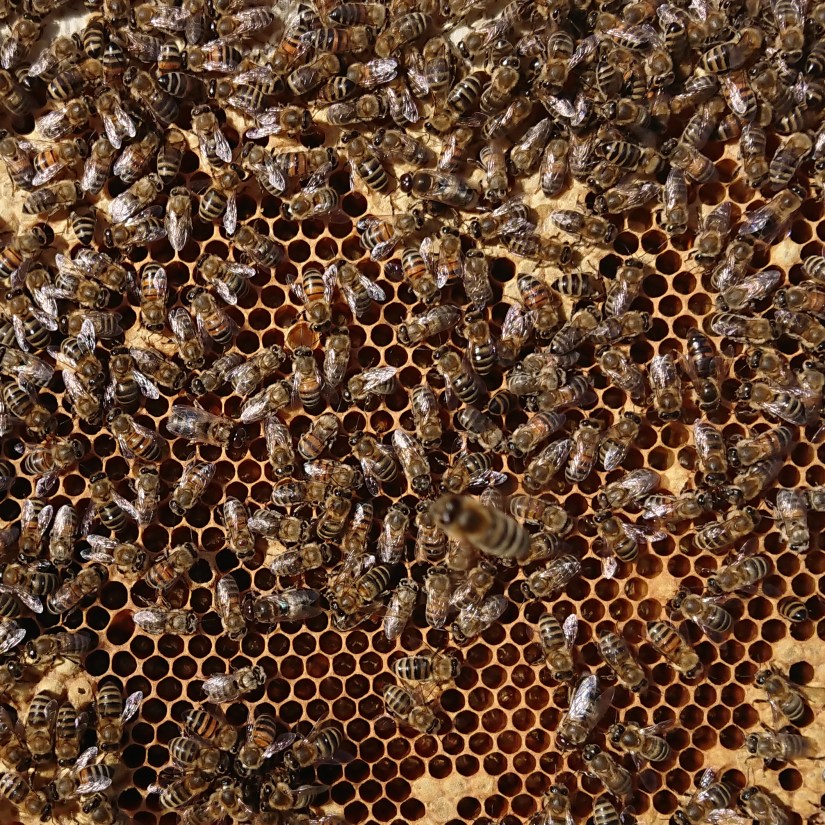
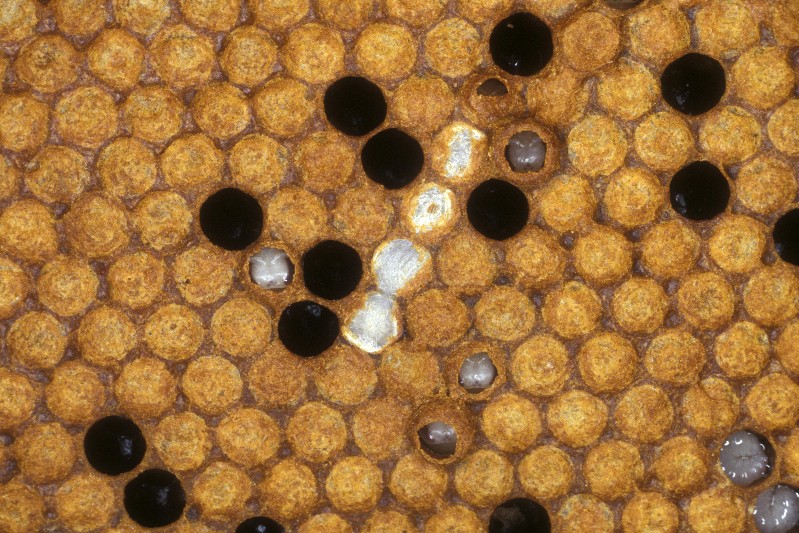
How does the pattern of your sealed brood look? Is it a good and consistent pattern or is it pepper-pot-ish? If the pattern is pepper-pot, by this we mean that the pattern has empty cells. This can be a sign of high brood mortality, the bees will have uncapped and removed any dead larvae thus leaving empty cells, or it could be diploid drones which do not survive to full development and again the bees will remove them leaving a poor laying pattern. A pepper-pot pattern can also be a result of a queen who is having difficulty laying.
Chalk BroodSac BroodBald BroodChalk BroodChronic Bee ParalysisChalk Brood MummiesCourtesy The Animal and Plant Health Agency (APHA), Crown Copyright
Also have a look at the floor, are there a lot of dead bees that the colony are struggling to clear away or are there lots of dead bees outside in front of the hive? It is worth mentioning that you will most likely always see dead bees outside the hive after winter. Depending on how strong the colony is you may also find that you have lots of dead bees on the hive floor. A stronger hive will have plenty of workers who will keep a clean house and they may have removed them but a colony that is struggling will not have the man power to house clean. If however you are mid season and you see lots of dead bees there may be a problem. Also look at the adult bees, do they look healthy overall? Are their wings deformed or do your bees look hairless and shiny?
A few bees here with deformed wing virusDeformed Wing
In the case of varroa infestation, any damage can be averted as long as you treat before your mite levels are growing beyond your colony’s control. If you do see signs of varroa damage in the colony treat straight away. All colonies will have varroa however some bees will be better at tolerating / dealing with varroa then others. You can manage your varroa by proactively doing a mite count. We have a separate FAQ’s page covering varroa.
Shiny hairless bees may be chronic bee paralysis virus (CBPV). If you’re not well versed in the various diseases and pest damage, I would seek help and advice from an experienced beekeeper. You can also find lots of advice on BeeBase.
CBPVCBPVCourtesy The Animal and Plant Health Agency (APHA), Crown Copyright
Space
Whenever you are doing a hive inspection you should always be considering the available space for the bees. From the moment you take your crown board off you should be able to see if there is a suitable amount of space in either the brood box, or if you have supers on, space in the supers. As a rule of thumb, when you supers are full of bees, that means all frames covered in bees, you are ready for a new super. If you don’t have supers on your bees yet, then see how many frames your bees are covering in the brood box. If they are really congested, you may have seen evidence that they have started to build wax up through the holes in the crown board and into the roof! Be wary if they have done this as they may be so congested that they are pulling queen cells with a view to swarming – see our separate post on swarming!
It’s not only about giving the bees enough space to expand, it is also imperative to not be giving the bees too much space before they are ready. A smaller colony may not have enough strength in numbers to keep a constant temperature throughout the hive and as a result they may struggle to stop any brood from chilling.
On the other end of the spectrum, as mentioned above the lack of space pushes the bees to start thinking about swarming! All beekeepers want to avoid their colony from swarming because it takes a lot longer for a colony to become productive again. There is also the risk that the new virgin queen may not come back from their mating flight. Rule of thumb is that 1 frame of capped brood will become 3 frames of bees so as you’re going through your hive consider whether you may need to add supers. It seems obvious but do consider the time of the year, don’t be adding supers too late in the season as your colony will be reducing not expanding.
In Summary
I hope that gives you a good idea of the four main elements to keep in your mind when going through a colony. It may seem that there is a lot to remember, but as your experinece builds up these will become second nature and in time things that don’t quite look right will stick out like a sore thumb.
When first starting out it is always best to have a good mentor who can assist you when you’re going through your colonies, they may be able to spot things that you miss. Before you know it, you’ll probably become a mentor to a beginner beekeeper yourself!
Rob was initially my mentor before becoming my business partner!